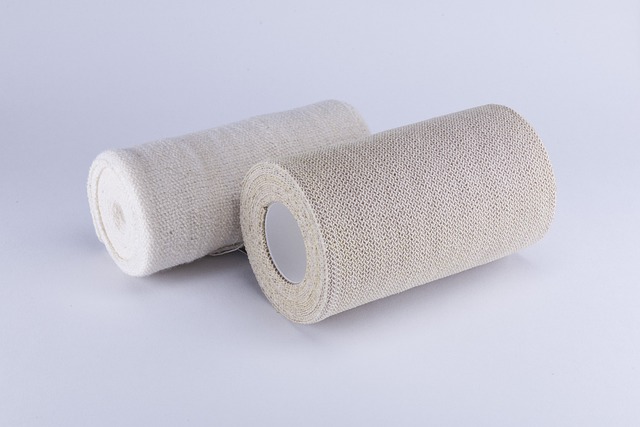
Proper Duration of Gauze Usage for Post-Tooth Extraction: A Helpful Guide
Welcome to our informative guide on the proper duration of gauze usage for post-tooth extraction! If you’ve recently had a tooth extracted, you might be wondering how long you should keep that trusty piece of gauze in your mouth. Well, worry not! We’re here to provide you with easy-to-follow advice and friendly tips to ensure a smooth healing process after your extraction. Understanding the duration of gauze usage plays a crucial role in protecting the extraction site and promoting faster healing. So, let’s delve into the details and equip you with the knowledge you need for a comfortable recovery.
1. Introduction: Understanding the Importance of Proper Gauze Usage after Tooth Extraction
Proper gauze usage after a tooth extraction is crucial for a successful and speedy recovery. It plays a vital role in preventing excessive bleeding, promoting healing, and minimizing the risk of infection. In this section, we will delve into the importance of understanding how to use gauze correctly to ensure optimal results.
1. Prevents Excessive Bleeding: When a tooth is extracted, a blood clot forms to protect the exposed socket and initiate the healing process. By placing a piece of clean sterile gauze over the extraction site and applying gentle pressure, you can aid in the formation and stabilization of this clot, preventing excessive bleeding. Remember to replace the gauze regularly as instructed, usually every 30 to 45 minutes, until the bleeding subsides significantly.
2. Aids in Healing: Proper gauze usage also supports the healing process by keeping the extraction site clean and protected. Gauze acts as a barrier, preventing food particles and other debris from entering the open socket, which could potentially lead to infection or complications. By following the aftercare instructions provided by your dentist or oral surgeon, including the use of gauze, you are assisting in the development of healthy tissue and reducing the chances of post-extraction issues. Remember, the healing process requires patience, and consistent and appropriate use of gauze can greatly contribute to a smooth recovery.
2. When to Use Gauze: Key Considerations for Post-Tooth Extraction Care
After a tooth extraction, the use of gauze is an integral part of the post-care routine for a successful recovery. Here are some key considerations to keep in mind:
- Duration: It’s important to keep the gauze in place for at least 30 minutes after the extraction to allow a blood clot to form. This clot helps to protect the extraction site and promote healing. However, be sure not to leave the gauze in for too long, as it can hinder the formation of a healthy clot.
- Changing gauze: If bleeding persists after 30 minutes, gently remove the initial gauze and replace it with a fresh piece. Fold the gauze into a small pad, place it directly over the extraction site, and apply firm pressure for another 30 minutes. Remember to bite down gently to assist in the blood clotting process.
- Controlled bleeding: Blood and saliva mix can be common after an extraction, but it’s essential to monitor the bleeding. If it continues to be heavy after two hours, consult your dentist immediately, as this could indicate a complication. In the meantime, continue to use gauze to maintain pressure on the site and minimize blood flow.
By following these key considerations, you can ensure a smoother and more comfortable recovery process. Remember to consult your dentist if you have any concerns or questions regarding gauze usage or post-tooth extraction care.
3. The Basics: How to Choose and Prepare the Right Gauze for Your Needs
When it comes to choosing and preparing gauze for your specific needs, there are a few important factors to consider. Here are some tips to help you make the right choice:
- Consider the size: Gauze comes in various sizes, so be sure to choose one that fits the wound or area you need to cover. For larger wounds, opt for a larger size, while smaller sizes are suitable for minor cuts and scrapes.
- Check the material: Gauze can be made of different materials, including cotton, non-woven fabrics, or even a blend of both. Cotton gauze is highly absorbent and perfect for wounds that require frequent dressing changes, while non-woven gauze is less likely to stick to the wound.
- Consider specialized options: Depending on your needs, there are specialized types of gauze available. For example, if you require gauze for delicate skin or sensitive areas, look for hypoallergenic or extra-soft options to ensure maximum comfort and minimal irritation.
Preparing gauze for use is also a crucial step to ensure it’s clean and ready for application. Here’s what you should do:
- Wash your hands: Before handling gauze, make sure your hands are clean to prevent any potential contamination.
- Sterilize the packaging: Most gauze comes in sterile packaging. However, it’s always good practice to double-check and make sure the packaging is intact and free from any damage.
- Inspect the gauze: Carefully examine the gauze to ensure it’s clean and free of any visible debris or particles.
- Use proper storage: When preparing gauze for future use, store it in a clean, dry place, away from moisture and direct sunlight, to maintain its integrity.
Remember, selecting the right gauze and properly preparing it are essential for effective wound care. By following these basic guidelines, you’ll be better equipped to choose and utilize gauze effectively for your specific needs.

4. Insertion and Placement Techniques: Ensuring Effective Gauze Positioning for Optimal Healing
When it comes to wound care, proper insertion and placement techniques are crucial for promoting optimal healing and preventing infection. To ensure effective gauze positioning, follow these helpful tips:
1. Cleanse the wound: Before inserting the gauze, make sure to clean the wound thoroughly with a mild antiseptic solution or sterile saline. This helps remove any debris or bacteria that may hinder the healing process.
2. Choose the right size and type of gauze: Select a gauze dressing that is appropriate for the size and nature of the wound. Ensure the gauze is large enough to cover the entire wound area while leaving a margin for secure placement.
3. Ensure proper padding: If necessary, provide additional padding around the wound to protect it from potential external pressure or trauma. Be careful not to layer the padding too thick, as it may affect the fit of the gauze and compromise its effectiveness.
4. Position the gauze carefully: Place the gauze directly over the wound, ensuring complete coverage. Gently press the gauze onto the wound bed, making sure it adheres well without causing discomfort to the patient.
5. Secure the gauze in place: Use medical tape or specialized wound dressings to secure the gauze in position. Make sure the gauze is snug but not too tight, as this may impede blood circulation and hinder healing.
Following these insertion and placement techniques will help optimize wound healing by maintaining effective gauze positioning. Remember to regularly monitor the wound and seek medical assistance if there are any signs of infection or complications.

5. Expected Duration: How Long Should Gauze be Kept in Place after a Tooth Extraction?
After getting your tooth extracted, it’s important to know how long you should keep the gauze in place to promote healing and prevent any complications. Here are some guidelines to help you determine the expected duration for gauze placement:
1. Follow your dentist’s instructions: Your dentist will provide you with specific instructions tailored to your individual situation, so it’s essential to adhere to their guidance. If they advise a specific duration for keeping the gauze in place, be sure to follow it accordingly.
2. Typically 30-45 minutes: In most cases, it’s recommended to gently bite down on the gauze for 30-45 minutes after tooth extraction. This duration allows the blood to clot properly, promoting the healing process. However, every person’s healing time may vary, so be sure to consult your dentist for precise advice.
3. Replace as needed: If the gauze becomes saturated with blood, it’s important to replace it with a fresh piece. Gently bite down on the new gauze for another 30-45 minutes and assess if replacement is necessary again. Repeat this process until the bleeding stops, ensuring that you’re using clean gauze each time.
6. Signs to Look out for: Indications for Gauze Removal or Replacement
When it comes to wound care, gauze plays a crucial role in promoting healing and preventing infections. However, it is important to monitor the progress of the wound regularly and be aware of signs that may indicate the need to remove or replace the gauze. Here are a few key indications to look out for:
- Soaked or saturated gauze: If the gauze becomes completely soaked with blood or other bodily fluids, it is time to remove and replace it. An excessively moist environment can hinder healing and increase the risk of infection.
- Foul odor: A foul smell emanating from the wound or gauze could indicate the presence of bacteria or infection. In such cases, it is important to consult a healthcare professional for appropriate treatment and gauze replacement.
- Increasing pain or discomfort: If the wound starts to cause more pain or discomfort, it may be a sign that the gauze is not providing adequate protection or may be irritating the wound. Consult with your healthcare provider to assess the situation and determine if a gauze replacement is necessary.
Remember, proper wound care includes closely monitoring the condition of the gauze and the wound itself. By staying vigilant and looking out for these signs, you can ensure optimal healing and minimize complications. If you have any concerns or questions, do not hesitate to reach out to your healthcare provider for guidance.
7. Handling Bleeding: Managing Post-Extraction Bleeding with the Help of Gauze
In some cases, bleeding may occur after a tooth extraction. Fortunately, this can often be managed effectively with the help of gauze. Here are some steps to help handle bleeding and encourage proper healing:
– Start by folding a piece of sterile gauze into a small, thick pad.
– Carefully remove any blood clots from the extraction site using a clean piece of gauze or a cotton swab.
– Once the area is clear, place the folded gauze directly over the extraction site and apply gentle but firm pressure using your finger or biting down on it. This pressure helps to promote blood clotting and control bleeding.
– Hold the gauze in place for about 30 minutes to allow ample time for the clot to form. Avoid checking the site too frequently as this may disrupt the clot formation.
– If bleeding persists, replace the gauze pad with a new one and continue applying gentle pressure. It’s normal for some oozing to occur, but persistent bleeding should be addressed.
– Keep in mind that it’s important to avoid rinsing forcefully, using a straw, or smoking as these actions can dislodge the blood clot and prolong bleeding.
– If bleeding continues for longer than a few hours or is excessive, contact your dentist for further guidance.
Remember, using gauze to manage post-extraction bleeding can be an effective way to promote healing and prevent complications. By following these steps, you can help ensure a smooth recovery process and minimize any discomfort.
8. Removing Gauze: Step-by-Step Guide for Safe and Effective Gauze Removal
When it comes to removing gauze, it’s essential to follow the right steps to ensure a safe and effective process. With these simple guidelines, you can confidently remove gauze without causing any discomfort:
- Gather the necessary supplies: Before starting, make sure you have clean gloves, a clean basin with warm water, and a towel or cloth.
- Wash your hands: Proper hand hygiene is crucial to prevent the spread of germs. Before touching the gauze or the wound, thoroughly wash your hands with soap and warm water.
- Put on your gloves: To maintain a clean and sterile environment, put on disposable gloves before handling the gauze or coming into contact with the wound.
- Moisten the gauze: Dip the gauze in warm water to gently soften any dried blood or fluids. This will make the removal process more comfortable and less likely to cause any pain or irritation.
- Hold the gauze securely: Using a gentle but firm grip, hold the gauze near the wound to prevent it from snagging or pulling on the skin. Be careful not to touch the wound directly.
- Slowly remove the gauze: Start at one corner and slowly peel the gauze away from the wound in the direction of hair growth. If the gauze sticks, moisten it again with warm water to ease the removal process.
- Dispose of the gauze properly: Once you have removed the gauze, dispose of it in a medical waste container. Do not reuse or flush it down the toilet, as it may contain bodily fluids that could lead to contamination or blockages.
- Cleanse the wound: After removing the gauze, follow the instructions provided by your healthcare provider to clean and dress the wound properly. This will facilitate healing and prevent infection.
By following these step-by-step guidelines, you can confidently and safely remove gauze without causing any harm to yourself or the wound. Remember to always consult your healthcare provider if you have any concerns or questions about the gauze removal process.
9. Progress Monitoring: How to Assess Healing and Determine if Gauze is Still Necessary
In order to assess the healing progress of a wound and determine whether gauze is still necessary, there are several key factors to consider. By monitoring these indicators closely, you can ensure that the wound is healing properly and take appropriate action if needed:
- Appearance: Examine the wound for any signs of infection, such as redness, swelling, or pus. A healing wound should gradually have a lighter color and show signs of closing.
- Size: Measure the dimensions of the wound regularly. If it’s consistently shrinking, it indicates healing progress.
- Drainage: Observe the amount and type of fluid coming from the wound. A decrease in excessive drainage is a positive sign.
- Pain: Assess the level of pain experienced. Gradual reduction in pain can indicate healing, while increased pain or sharp, persistent pain may require medical attention.
Remember that each wound is unique, and healing time can vary. However, if you notice any signs of infection or lack of progress, it’s important to consult a healthcare professional. Depending on the assessment, they may advise continuing the use of gauze to protect the wound or suggest alternative approaches to promote healing.
10. Conclusion: Taking Care of Your Oral Health with Proper Gauze Usage after Tooth Extraction
Proper gauze usage after tooth extraction is essential for maintaining good oral health and promoting a speedy recovery. Following these simple steps can help ensure that your healing process goes smoothly:
- Change the gauze regularly: It’s important to replace the gauze pad every 30 minutes or as directed by your dentist. This helps to control bleeding and keeps the area clean. Avoid using tissue or cotton balls as a substitute, as they can leave fibers behind and potentially irritate the extraction site.
- Bite down gently: After placing the fresh gauze pad, bite down on it gently but firmly. Applying gentle pressure helps to form a blood clot, which is crucial for healing. However, be careful not to bite down too hard, as it can disrupt the clotting process and lead to prolonged bleeding.
- Avoid excessive rinsing and spitting: For the first 24 hours, refrain from rinsing your mouth vigorously or spitting forcefully. Doing so can dislodge the blood clot and delay healing. Instead, let the saliva passively flow out of your mouth, or use a gentle, saltwater rinse after 24 hours to keep the area clean.
Remember to closely follow any additional instructions from your dentist or oral surgeon to ensure proper healing. Taking care of your oral health during the post-extraction period is important for preventing complications and promoting a smooth recovery. By practicing proper gauze usage, you will be well on your way to a healthier and happier mouth.
Frequently Asked Questions
Q: How long should I use gauze after a tooth extraction?
A: The recommended duration for gauze usage after a tooth extraction is approximately 30 minutes to an hour.
Q: Why is gauze important in the healing process?
A: Gauze plays a crucial role in the healing process by promoting blood clot formation and preventing excessive bleeding from the extraction site. It also helps to protect the area and keep it clean.
Q: Can I remove the gauze earlier than the recommended time frame?
A: It is generally advisable to leave the gauze in place for the recommended duration to ensure proper clot formation. Premature removal may lead to prolonged bleeding or other complications.
Q: What should I do if the bleeding persists after removing the gauze?
A: If bleeding continues, don’t panic. Place a fresh piece of gauze over the extraction site and apply gentle pressure for an additional 30 minutes. If the bleeding persists after repeating this process, contact your dentist for further guidance.
Q: Are there any alternatives to using gauze for managing bleeding?
A: Yes, there are alternatives to gauze. Your dentist may suggest using a moistened tea bag (preferably black tea) or a medicated hemostatic dressing in some cases. However, gauze remains the most commonly recommended option.
Q: Should I change the gauze frequently?
A: It is usually unnecessary to change the gauze frequently unless it becomes heavily soaked with blood. If the gauze is not saturated, you can leave it in place until the recommended time frame has passed.
Q: What should I do if the gauze sticks to the clot when removing it?
A: If the gauze sticks to the clot, do not forcefully pull it off. Instead, moisten the gauze with a few drops of sterile saline or water to help loosen it from the clot. Gently remove the gauze to avoid disturbing the forming blood clot.
Q: Can I eat or drink while using the gauze?
A: It is best to avoid eating or drinking while using the gauze to prevent dislodging the blood clot or causing bleeding. Stick to a soft or liquid diet for the first few hours after the extraction to promote a smoother healing process.
Q: How should I dispose of the used gauze?
A: Used gauze should be disposed of properly to maintain hygiene. Wrap it securely in tissue or a plastic bag and dispose of it in a designated waste bin.
Conclusion
In conclusion, understanding the proper duration of gauze usage after a tooth extraction is crucial for a successful and comfortable recovery. By following the guidelines outlined in this helpful guide, you can ensure a quick healing process and minimize any potential complications. Remember, it is vital to consult with your healthcare professional to receive personalized advice and address any concerns you may have.
We hope this article has provided you with clear insights into the appropriate duration of gauze usage. Remember, a gentle touch, adequate rest, and proper oral care are key elements in achieving a smooth recovery. Should you have any questions or need further information, feel free to reach out to your dentist or oral surgeon. They are always there to aid you in your journey to optimal oral health.
Keep in mind that each individual’s recovery process may vary, so it is crucial to listen to your body and provide it the necessary time to heal. By following these recommendations, you can soon bid farewell to gauze and say hello to a healthier, pain-free mouth.
Thank you for taking the time to read this informative guide. We wish you a speedy recovery and a joyful smile that lasts a lifetime.